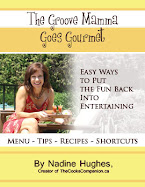
Free Menu Planner Sample

Visit http://www.themenucompanion.com/ to get your free menu planner sample today.

The Groove Mamma Goes Gourmet - Best Canadian Entertaining Cookbook

Monday, September 22, 2008

I have always found food and wine trends fascinating. In my business I find new products, flavours and ideas well before they hit mainstream so it’s always interesting to see how on the mark my personal favourites become.

Those who know me personally, know that Sparkling Wine has been my drink of choice for years. It’s so often reserved for special occasions but never in my house. When you consider that you can purchase a really good quality Prosecco or Cava (Italian and Spanish sparkling wines) for around $13, price isn’t a factor as most people spend on average $15 a bottle for wine. Sparkling wine is also a very versatile drink to pair with many different types of food. As a general rule the more a wine makes your mouth pucker, the better it is to match with foods and the crisp bubbles of a sparkling wine do just that! Plus I love the taste and it always makes me feel special even on a Tuesday night!


The other drink I have always been fond of is Tequila. Now most people raise their eyebrows when I tell them this as they see Tequila as a harsh, throw it back shot. But a small sipping glass of gold tequila can be a wonderfully rich, smooth and enjoyable experience. So I had to chuckle when this summer seasons LCBO Food & Drink magazine had an article on “Tequila Comes of Age” praising the merits of “sipping tequilas”. These are refined 100% agave spirits that are viewed in the same manner as single-malt Scotch. Tequila is now enjoying a soaring popularity and a sophisticated new image.


If you haven’t tried Tequila in a while, invite a few friends over and sample some of the newer brands on the market. Just make sure to serve some Tequila inspired dishes to help keep the party on an even keel!

Monday, September 01, 2008

The Memory Keeper’s Collection


It is often said that sounds, smells and tastes can bring us back to a long forgotten memory in an instant. The aroma of bacon and onions frying transcends my father back to his grandmother’s kitchen early on a Sunday morning; the ping of a flag pole line instantly has my husband recalling days of sleeping aboard the family sailboat as a small boy and every time I taste wild mushrooms I subconsciously find myself traipsing through a damp forest with my family searching for these woodsy delights.

So too do sensations and memories play an important role for Martin Malivoire when he speaks of his love of wine. Martin, owner of Malivoire Wine Company with his partner Moira Saganski, has been an passionate collector of wines for the past few decades. Through his work as a film and television special effects supervisor and now winery owner, Martin has had the pleasure of traveling to all corners of the world and in doing so has made it a habit to seek out small, unknown areas for wine. “I’d much rather travel to a small unrecognized wine region and immerse myself in the local food, wine and culture. It’s a great way to truly get to know a town, make some wonderful new friends and along the way uncover a few gems of wine, “explains Martin. “I’d find something I like; most often a house wine made down the road, and buy a half dozen cases to bring home with me.” And it’s a good thing for us he has.

As the lead donor to the 2008 Oakville Trafalgar Memorial Hospital’s Fine Wine Auction held on September 18th, Martin has donated over $200,000 worth of wine from his personal collection to be auctioned off in support of the Surgical Department of the Oakville hospital. Exciting wines such as a 1988 Penfolds Grange, South Australia, a 2001 Caymus Special Selection Cabernet Sauvignon, Napa California and 4 bottles of 1989 Chateau Petrus, each valued at $8,500. And although a bottle of Petrus may not make it onto everyone’s shopping list, there are wines to suit a variety tastes and budgets up for auction.

With such a vast collection, I asked Martin what it was that motivated him to acquire a specific wine. The answer was never about the cost of a bottle; whether it be $20 or $500; but about the story of the surroundings and the meal that was paired with the particular wine. He recalls for me a trip years ago to Roufach, France when after a damp, cold day of hiking, he and his traveling partner settled down in front of a crackling fireplace in a small bistro. He describes to me the many cyclists pedaling furiously past the window, a steaming dish of wild boar stew placed in front of him and a beautiful glass of ’88 Chateau Nouvelle Petrus (made down the road of course) that accompanied it. If it wasn’t for the 30 degree temperature in July, I too felt like I was snuggling back into the bistro chair rejuvenating myself with the fire and wine.

But for Martin, wine is not just for enjoying and collecting; it’s also his livelihood. Malivoire Wine Company, based in Beamsville, Ontario, released its first wine in 1997 to great reception and has continued to steadily increase not only the volume but the variety of wine it produces. New releases this summer include a 2006 Courtney Gamay and a 2007 Gewürztraminer. In addition to bidding on the over 450 bottles of wine, the OTMH Wine Auction attendees will be able to sample 3 of Malivoire Wine Company’s more popular wines on the night of the 18th; 2006 Ladybug Rose, 2006 Chardonnay and the 2006 Gamay. The wines will be paired with a selection of hors d’oeuvres and Martin will be on hand to share with you not only his wine but the stories that go with them.

With such wonderful memories, it’s hard for Martin to part with a selection of his cellar but in doing so he not only supports a wonderful cause in the Oakville Trafalgar Memorial Hospital but he also makes room for future wine adventures that will no doubt create new and lasting memories. To purchase your tickets to the OTMH Fine Wine Auction, showcasing a spectacular private collection, Malivoire wines and the man himself, visit http://www.otmhfinewineauction.com/ or contact Amanda Moore at 905-845-2571 ext. 6247.

Here’s a wonderful recipe courtesy of Malivoire Wine Company and Gamelle Restaurant in Toronto. Paired with the 2007 Malivoire Gewurztraminer it makes a delicious first course or light dinner. Enjoy!

Braised Onion and Brie Galette
Recipe provided by Chef Sean Moore of Gamelle restaurant in Toronto
Tips: For a quicker version, use ready to roll puff pastry or fresh pizza dough in place of making your own dough.
Beverage Pairing: 2007 Malivoire Wine Co. Gewurztraminer


For the Dough:
· 2 cups all purpose flour
· 1/2 lb unsalted butter, cut into small pieces
· 1 teaspoon salt
· 4-6 tbsp cold water


In a mixing bowl, combine the flour, butter and salt by rubbing them together with the tips of your fingers. When the butter and flour is the consistency of pea-sized pieces, turn the mixture onto a clean surface. Form a well in the middle of the flour-butter mixture and pour the water into it. Using the tips of the fingers of one hand, gradually work the flour into the water using a circular motion. Knead the resulting dough into a flat ball, cover with plastic and refrigerate for 1/2 hour.

For the Filling:


· 1 fennel bulb, trimmed of stems and root, sliced thinly
· 2 large Vidalia onions, peeled and sliced thinly
· 1 teaspoon chopped fresh thyme
· 100 mL Malivoire's Ver Jus (or substitute dry white wine)
· 1 tablespoon butter
· salt and pepper to taste


Place the butter in a saucepan over medium heat. When the butter begins to foam, add the sliced fennel and onion. Stir to coat the vegetables with butter. Add the fresh thyme and cover the pot with a lid. Turn the heat down low and allow the onion and fennel to cook and soften for about 30 minutes, stirring occasionally to prevent browning. Remove the lid and add the ver jus. Allow the mixture to cook further, stirring occasionally, until it reaches the consistency of a thin marmalade. Season to taste and remove from heat. Allow to cool completely.

To Finish:


· 200 grams Brie cheese, cut into small pieces
· 1 small bunch fresh Arugula
· A handful of toasted pumpkin or sunflower seeds (optional)
· 1 tablespoon extra virgin olive oil
· 2 beaten egg yolks


Preheat the oven to 350F.
Roll the pastry dough into a 10-inch circle. Move the dough onto a pizza pan or baking sheet. Spoon the onion-fennel filling into the center of the pastry and spread out evenly over the pastry, leaving 1 inch of uncovered pastry around the edge. Sprinkle the brie over the filling. Working around the outside of the galette, fold the uncovered 1 inch of pastry dough over the first inch of filling until you have a rough tart with a large exposed section of filling in the middle. Brush the pastry edges with the egg yolk. Bake for 30 minutes until pastry is golden brown and cooked through. Remove and allow to cool to room temperature.
Toss the fresh arugula with olive oil, pumpkin/sunflower seeds and a little salt. Arrange in the center of the galette. To serve, slice into wedges, and plate with some arugula on the side. Enjoy!


Malivoire Wine Company
3920 King Street West
Beamsville, ONT L0R 1B0
905-563-9253 http://www.malivoirewineco.com/

Oakville Trafalgar Memorial Fine Wine Auction
Thursday September 18, 2008
http://www.otmhfinewineauction.com/ 905-845-2571 ext.6247

Friday, July 18, 2008

Hurry Up and Slow Down


I always look forward to the month of July and not just because of the glorious weather. After the craziness of the school year I take my two boys and head north to the cottage. Here there are no set schedules, no soccer games/hockey games/play dates to drag the kids off to, no stores to whip out to, no movies we “have” to go and see and no “important” errands. Instead there is a sense of calm and relaxation. And instead of me constantly chanting to the kids, “Hurry up, hurry up. We’re going to be late”, I find myself taking the time to actually enjoy my children. Jumping off the dock, looking for frogs and island hopping are daily rituals. So our family meals have to reflect this unhurried and relaxed pace. Meals are usually always cooked on the BBQ and almost never require a lot of preparation. Here’s an easy and fun meal that is perfect for those long, lazy days of summer. Marinate the chicken ahead of time and give your family the task of husking the corn so everyone gets to enjoy the most of the day without being in the kitchen. So come on…hurry up and slow down!

Chicken & Chorizo Skewers
Serves 6
Ingredients:
· 8 (about 600g) chicken thigh fillets, cut into medium sized pieces
· 1 tablespoon olive oil
· 2 garlic cloves, crushed
· 2 teaspoons ground oregano
· 2 teaspoons sweet paprika
· 1 tablespoon fresh lemon juice
· 2 teaspoons brown sugar
· 4 chorizo sausages, thinly sliced diagonally
· Crusty rolls, split, to serve
· Spicy Barbecued Corn on The Cob (see recipe below)

Combine chicken, oil, garlic, oregano, paprika, lemon juice and sugar in a bowl. Place in the fridge for 2 hours to marinate or overnight.

Evenly thread the chicken, alternating with chorizo, among the skewers. Note: If using wooden skewers, make sure you soak them in water for 15 minutes prior to using. This will ensure they don’t burn on the BBQ.

Heat a barbecue on medium high heat. Add the skewers and cook, turning, for 6-8 minutes or until chicken is cooked through. Remove from heat and place in the fridge to chill. Serve with rolls, corn and a green salad.

Spicy Barbecued Corn on the Cob
Makes 6 servings
Ingredients:
· 6 cobs of fresh corn, husks and silks removed
· 1 tablespoon olive oil
· Salt
· Pepper
· Chili powder
· 2 limes, quartered

1. Preheat a BBQ to medium high heat.

2. Brush the corn with the oil and BBQ turning frequently for 10 minutes or until tender and golden brown.

3. Remove from heat and season with salt, pepper, chili powder to taste. Squeeze fresh lime or each cob. Enjoy!

Sunday, June 22, 2008

Buttermilk Rhubarb Coffee Cake


The spring harvest season in Ontario has taken a slight beating this year with our long and cold winter that lasted well into April and even May in some parts. Because of this the traditional time for strawberry picking (June and July) will no doubt be pushed back. Most pick your own farms for berries (www.foodland.on.gov.ca) are not showing signs of readiness so far this season.

But just because the summer season fruits are behind schedule there are still many early harvest crops that are ready for you to enjoy now. Rhubarb is a perfect example. With it’s rosy colour and tart flavour, rhubarb is a perfect addition to so many dishes. Slow roasted with a splash of vanilla and sugar is a quick and easy dessert. And although it’s often paired with strawberries in pies, jams and puddings, rhubarb was classified as a vegetable up until the late forties. Sautéed with butter and deglazing the pan with wine makes for a wonderful accompaniment to roast duck or pork. But I’m one of those people who like my fruits at the end of my meal so when I have an abundance of rhubarb I turn to this wonderful recipe for Buttermilk Rhubarb Coffee Cake. When baked, the rhubarb releases enough moisture to add a delicious syrupy consistency that is sopped up by the coffee cake giving it a richness and moistness that is irresistible.

So put your thoughts of Strawberry Margaritas aside for a few weeks and enjoy the local flavour Rhubarb while it’s at its peak.

Buttermilk Rhubarb Coffee Cake
· 1 1/2 cups chopped rhubarb(in 1/4 -inch pieces)
· 3 tablespoons sugar
· Nonstick spray for the pan
· ½ cup (1 stick) unsalted butter, softened
· 2/3 cup sugar
· 2 large eggs
· 1 teaspoon vanilla extract
· 1 ½ cups unbleached all-purpose flour
· ½ teaspoon salt
· 1 teaspoon baking powder
· 1/8 teaspoon (large pinch) baking soda
· ½ cup buttermilk
Topping:
· 2 tablespoons brown sugar
· ½ teaspoon cinnamon

1. Preheat the oven to 350F. Place the chopped rhubarb in a bowl, and sprinkle with 3 tablespoons sugar. Let stand while preparing the batter.

2. Spray an 8-inch baking pan with nonstick spray.

3. Place the softened butter in a mixing bowl. Using beaters, add the sugar, and cream together until fluffy. Add the eggs, one at a time, beating well after each. Stir in the vanilla.

4. In a second bowl, stir together the dry ingredients until blended.

5. Add the dry mixture to the butter mixture, alternating with the buttermilk. Stir thoroughly, but minimally, until combined. Don't overmix.

6. Fold in the rhubarb, and transfer the batter to the pan. The batter will be somewhat stiff, and might seem to resist being spread into the pan.

7. In a small bowl, mix together the brown sugar and cinnamon, and sprinkle on top of the batter.

8. Bake for 25 minutes, or until a toothpick inserted all the way into the center comes out clean. Serve warm or at room temperature.

Thursday, May 22, 2008

What’s Your BBQ Personality?


I listened to a conversation this morning that my husband and a few male friends of ours were having. They were talking about the best methods to BBQ, whether to poke the sausages before you put them on, how hot the BBQ should be and what tools are the best for flipping. It was all done in a very manly “hey look at my flame” sort of tone. These guys literally started to morph into cavemen in front of my eyes. I had a good giggle to myself because I know for a fact that my husband doesn’t do any of the barbecuing in our house because he has what I call “a Slasher” BBQ personality. He insists on slashing into the meat on the grill to check it’s doneness about 20 times which infuriates me to no end because all he accomplishes is letting all those precious juices run out. He’s been banned from the BBQ after one too many dry steaks.

So I got to thinking what type of BBQ personality I was. I used to be “The Wanderer”. I had a tendency to multi-task while I had the BBQ going. You know the type…put something on the grill, walk away to do 18 other things like fix the rest of dinner, read school notes, check emails, break up a few squabbles and fold the laundry. Then smell the smoke and rush out with tongs in hand! Nothing a little spicy salsa couldn’t cover up but I have learned that it will save me time (and money with one too many burnt out BBQs) in the long run by paying attention to the task at hand.

Here are a few different BBQ personalities I have come across and some tips on getting your household griller in fine BBQ form.

The Poker: Keeps poking and stabbing holes in the meat to let some of the fat out. Similar to The Slasher but does it much more frequently! All this results in is the loss of juices that will keep your meat moist and tender. Use long handled tongs to turn food instead of a fork. Note: The Poker also usually likes to flatten out those big thick burgers, letting all those juices out and leaving you with a tough hockey puck to put between your bun.

The Flipper: The Flipper insists on turning the meat every 28 seconds resulting in leaving half the meat stuck on the grill. Let the meat get a good sear first before turning – only once. The meat will naturally “unlock” itself from the grill after a few minutes allowing all those flavours to be sealed in and keeping the meat from sticking to the grill.

The Baster: This person should have been a painter. Back and forth, back and forth with the basting brush they go. The Baster’s meat usually ends up with a sticky, burnt outside and an undercooked or incredibly dry inside, never mind the singed eyebrows from the constant flare-ups! Better to baste your food the last 10 minutes of grilling to reduce chance of burning. Remember not to baste the food with the marinade that the raw meat or poultry was sitting in to reduce any chance of food borne bacteria.

The Fast & Furious:
Probably the most dangerous of the lot, this person lights the BBQ to high and immediately slaps the food on. Then they leave the lid open, flipping, poking and prodding at a furious pace! Far better to let the grill heat up to high, sear your meat, then turn the temperature down to avoid burning the outside and undercooking the inside. Keep the lid closed to keep an even temperature and help to reduce unnecessary extended cooking time.

Tuesday, April 22, 2008

How “No” Led to Sizzling Success: The Cook’s Companion


Written by Bonnie Staring
Saturday, 01 September 2007

Hearing a big fat “no” was just what Nadine Hughes needed in order to discover how to launch her company anyway—and for a lot less money.
Nadine Hughes knew that when she and her family returned to Canada after living in Australia for five years, she didn’t want to continue her career in marketing, stuck behind a desk and working endless hours for someone else. “I wanted to be home for the kids, and for myself,” she admits. But Hughes struggled to determine what it was that she could do.

“It’s no big deal.”
At the time, she was reconnecting with old friends and meeting new neighbours by hosting fabulous parties that soon started earning her a reputation for being an exceptional hostess. “People were asking me who I used for catering and when I told them I did it myself, they’d be surprised,” says Hughes. “And I’d say ‘it’s no big deal’ instead of appreciating the value of that skill.”

Repeated compliments and requests for her “secret” got her thinking. Something that she was able to do naturally was a foreign concept to others. There was an entertaining epidemic that was affecting women (and men): many felt useless in the kitchen and even phobic when it came to preparing company-worthy meals or appetizers. Many, she discovered, felt that great food resulted from lengthy recipes that only trained chefs could master. And those who were able to produce desirable results spent so much time in the kitchen they never had a chance to visit properly with their guests.

The simmering of an idea.
That’s what triggered the idea for Hughes to create The Cook`s Companion: cooking and entertaining workshops. Not to be confused with standard cooking classes, her workshops focus on food preparation that’s quick, easy and delicious. She soon obtained estimates for renovating the family home (a 150-year-old barn) to include a large kitchen/classroom and approached her municipal office to obtain the permits necessary to operate the business.

“They turned me down flat,” says Hughes. “Even though I knew for a fact that some of my neighbours were running businesses out of their homes, the city told me that it was illegal to do so.” No permit meant no business—and the new entrepreneur felt ready to give up.
“I was so fixated on running my business out of my home that I didn’t see any other option,” says Hughes. All her plans stemmed from that crucial step and without it, she was lost.
What if?Then one of her friends made an outrageous suggestion: what if Hughes could use one of the local restaurants on the nights they were closed? Several of the upscale restaurants in her city closed on Sundays and Mondays, which meant a kitchen and “classroom” area—with tables and chairs no less—might be available to rent.
“Suddenly my need to spend thousands of dollars renovating my home disappeared,” says Hughes. After approaching two restaurants—both agreed. Her start-up costs went from over $20,000 to just under a grand for an initial fee for the spaces, food, classroom materials and flyers.

Holding classes within an established restaurant also gave her business an immediate legitimacy. “You can’t buy that,” says Hughes. She also benefitted from a captive audience, as most of her initial classes were attended by regular diners. Along with a rental fee, the restaurants receive exposure with each workshop, as well as mention promotional materials for The Cook’s Companion.

You can take it with you.
For Hughes, another huge benefit is being able to keep her business portable. “Summer means spending time at the cottage, and I can take The Cook`s Companion with me wherever I go,” she says with a laugh, as she plans on going for a swim once our interview is complete. This entrepreneur has expanded her roster to include workshops on BBQ basics and cottage entertaining—something she might not have come up with had she been based out of her home.

But don’t let her cost-effective beginnings fool you: this business has her working harder than any 9–5 job. “It’s taught me to be flexible...and creative,” admits Hughes. One method that has worked very well for her is bartering, as it forces her to place a value on her time and energy. “You have to make sure your time is well spent, whether networking, seeking ways to expand your business or generating word of mouth.”

All in all, it’s turned out to be a true recipe for success.


Preserved Lemons—are a tradition in Moroccan and Middle Eastern recipes. They are lemons that have been pickled in salt and their own juices. They are quite simple to make but take about 3 weeks before the lemons are ready to use. You can also find pre-made ones in specialty grocery stores. I personally like Maggie Beers preserved lemons and I have included a link to her site to give you more ideas on how to use these golden slices!


Dulce de Leche is a milk based syrup with Spanish origins. This decadent sauce is prepared by slowly heating sweetened milk to create a product similar in taste to caramel. It’s a long process to reach this caramel consistency and although I’ve always loved the taste I’ve been too lazy to recreate it at home. So when I saw that President’s Choice came out with their version of Dulce de leche (caramel crème spread) I quickly snapped it up. It’s excellent as a spread on bread or toast, a filling for crepes, topping for waffles, fruit or ice cream.

Tuesday, April 01, 2008

Sometimes the best plans are the ones that you don’t actually plan! Right now my family and I are supposed to be in Arizona enjoying a few days of sunshine while visiting the in-laws. But after pulling out the passports the day before we were set to leave, I was surprised to find my oldest son’s passport expired. With a long Easter weekend ahead of us and no government office open, chances of renewal in time for our flight was non-existent. So we postponed the flights and found ourselves with 4 days of no plans (and no fresh food) until the office opened on Tuesday morning.

I decided to do the “loaves and fishes” route from my pantry and refrigerator because it was still Easter after all and I wanted to give my family a nice meal. It’s amazing the meal you can pull together if you have a well stocked pantry. Plus, there is something truly cathartic about cleaning out the cupboard and I found myself with the time to do it. Once I started I couldn’t stop! Even though I had a pretty good idea what was in there I was still amazed at a few items I had forgotten about.

So here is a list of items that helped me pull together our “smorgasbord” Easter that was met with rave reviews from everyone in the family. We ate from big platters of a mixture of different cultures, textures, tastes and colours. It’s a great way to eat every once in a while and even though our original plans of an Easter BBQ in Arizona didn’t turn out, this meal will certainly be remembered by all as something for everyone.

· Haloumi Cheese – A semi-hard cheese that originated in Cypress, this cheese keeps for up to one year in your refrigerator, can be frozen, grilled, sautéed or eaten as is! A truly versatile cheese. I grilled thick slices in a hot pan, squeezed some lemon over them and served it with the hot bread.
· Frozen Bread – Heated them up in the oven from frozen, sliced them thickly and felt like I had just baked bread! I love the Ace Bakery brand as well as President Choice Naan Bread.
· Canned Escargot – I sautéed garlic in butter and tossed the escargot in for a few minutes, hit them with some sea salt, black pepper and a splash of sparkling wine. My husband thought he had died and gone to heaven!
· Canned or Fresh Whole Mushrooms – I had a few fresh ones that were on the edge but it didn’t matter once I sautéed them whole in some butter and garlic. Similar to the escargot, I added sea salt, black pepper and a splash of sparkling wine. Using the hot bread to soak up all the yummy juices was my favourite part of this dish!
· Canned Hearts of Palm and Artichoke Hearts - Drained and roughly chopped these canned vegetables make a great salad with a drizzle of lemon flavoured olive oil and black pepper.
· Frozen Smoked Salmon – De-thaws quickly which leaves me just the right amount of time to prepare all the other ingredients. I drizzled the salmon with lemon juice (even from the bottle!!), sprinkled some dried dill and popped a few capers on top. For some reason this is always my 6 year old’s favourite dish.
· Sparkling Wine – Even though it’s my drink of choice, it always makes any occasion feel extra special. Plus it matches all these different flavours the best!

Friday, March 07, 2008

New taped segments are available for viewing on Real Life with Sharon Caddy. Catch up on a decadent Raspberry & Fig Gratin as well as upcoming Easter segments where I show you how to decorate your Spring Table and show you a simple but spectacular recipe for Grilled Asparagus & Haloumi Salad that is a perfect way to start off your Easter meal. Simply go to the Real Life website and click on the Multimedia/Video Gallery.

Traditionally March heralds the end of winter and the start of spring. And even though the amount of snow here in Toronto does not seem to be letting up I know that eventually we will come out from under this blanket of white. I can’t wait for that first sniff of spring air, the early flowers to poke their heads out of the still cold ground and of course for all the wonderful tastes and flavours that herald the start of spring.

I find myself at this time of year craving fresh-tasting dishes which remind me that summer is just around the corner. Meals like warm salads, grilled fish and light springy vegetables such as asparagus are great stopgaps between hearty winter dishes and lighter summer meals.
Take a look around your local grocery store and see what is new and fresh to rev up your cooking and your spirits. You’ll do your body and mind a favour by tricking them into thinking spring is here just that little bit earlier. Because it is coming isn’t it? Isn’t it?

And for those of you not fortunate enough to be heading off for a sunnier location during March Break check out my most recent column “In Like A Lion and Out Like A Lamb”. I share with you two recipes that I call “snacktivities” that will have you spending time in the kitchen with your kids reinforcing good eating habits as well as the importance of them gaining confidence and independence in the kitchen. And it also helps to eat up time during this long break!!! To read the column check out my entry below or any of these websites and while you’re there see what else they have to offer you during March Break.

www.kiddingaroundtoronto.com www.lifewithkids.ca www.torontoparentsguide.com www.workingmoms.ca www.oakvillemoms.com www.cityparent.com

So keep shoveling, it will end and we’ll soon be sipping margaritas by the pool and complaining about the heat. Happy Spring and Happy Easter to you all. Bon Appétit.

Monday, March 03, 2008

In like a lion and out like a lamb. This old saying might have been referring to the rapid weather change in March but in my house I think it’s more like the mood of my children. With March break hurtling towards us, my 7 year old is hopping around like crazy with anticipation of 19 (yes I did say 19!!) glorious school free days. I on the other hand am hopping around trying to figure out just what the heck I am going to do with him for all those hours.

Like all extended school breaks the first few days will be filled with excitement and noise (this is where the roar of the lion comes in) but then it will soon peter off to the whine of the lamb, “I’m bored. There’s nothing to do.” In my house this is the time to pull out all the stops; arts and crafts, library visits, dress up time and of course Kitchen Creations. My two boys and I will head into the kitchen and make “snacktivities”. We get creative and playful with our food and for once don’t worry about the mess we make. Snacktivities eat up lots of time, reinforces good eating habits and also continues their appreciation of making their own meals.
Here are a couple of favourites of my sons that you can try with your little lions. Enjoy!


Apple Saturn Biscuit Circles
Serves 4+
Special Equipment Needed: Rolling pin, 3 inch round cookie cutter, melon ball scoop
Ingredients:

* Baking mix, such as Bisquick
* 1 apple, peeled (you can substitute pears as well)
* Butter, optional

1. Preheat oven to 425F. Prepare biscuit batter according to the package directions.
2. Roll out the biscuit dough with a rolling pin to about 1/2 inch thick.
3. Cut the biscuits with a 3 inch round cookie cutter (or use rim of glass) and then cut out a smaller 1 inch circle inside the 3 inch round so it resembles a doughnut shape.
4. Put the “doughnut” biscuits on a baking sheet.
5. Using a melon baller, scoop into the apple and turn to scoop out apple balls. Place an apple ball in the hole of each biscuit.
6. Bake the apple biscuits according to package directions, usually about 8 minutes or until golden brown.
7. Remove from oven, let cool slightly and serve with butter if desired.

*Recipe adapted from “Cooking Art”- MaryAnn F.Kohl and Jean Potter


Sailboat Eggs
Makes 8 sailboats
Special Equipment Needed: Toothpicks for masts, scissors, and paper for sails
Ingredients:

* 4 hard-boiled eggs
* 1 tablespoon mayonnaise
* 1 teaspoon mustard
* 1 cup diced green peppers (or red, or yellow)
* Carrot sticks
* Celery sticks
* Chopped pickles
* Lettuce leaves

1. Peel the hard-boiled eggs and discard shells.
2. Cut the eggs in half lengthwise.
3. Remove the yolks and place them in a bowl with the mayonnaise and mustard and mash together.
4. Spoon the mixture back into the egg white sections.
5. Decorate the egg sections with the celery sticks, carrot sticks and chopped pickles.
7. Cut paper into small sail shapes and attaché to the toothpicks with glue or tape. Decorate eggs with sails.
8. Place the lettuce on a serving plate and put the eggs on top like ships floating in the sea.

*Recipe adapted from “Cooking Art”- MaryAnn F.Kohl and Jean Potter

Friday, February 29, 2008

You might have noticed this month that our logo has changed. Since I first started The Cook’s Companion in April 2005 so many wonderful new avenues have opened up for the business. I’ve branched out into food writing, TV presenting, private classes and kitchen coaching just to name a few. I’m very excited about this new look as I think it better reflects what The Cook’s Companion is all about—bringing you new and fun ideas on food and entertaining but in a non-intimidating and hopefully amusing style! I’d love to hear what you think about this new look so drop me a line if you get a chance.


The logo is not the only thing new around here. Launching in February is my newest service—The Menu Companion. We all love to enjoy a great meal with friends and family but preparing for a special evening can take a huge amount of time—not just the cooking, but the planning and the preparation. This is where The Menu Companion can help.


Choose from a wide selection of dinner party menus that will offer you and your guests a delicious and visually stunning meal with a minimum amount of time and effort on your part. The entire menu is mapped out and timed for you from the organized shopping list to the identically scaled recipes to the pre-planning that is required. It’s simple and easy to use. I know you’ll love this service so much that I’ll let you try it for free before you buy. Check out the website today at http://www.themenucompanion.com/ and your next dinner party is only a few clicks away!


So between switching all of our marketing materials over to our new look, creating and tasting lots of wonderful new recipes for The Menu Companion and still keeping up with cooking classes, life has been a bit crazy in my kitchen but I wouldn’t trade it for the world!


I hope you are spending your time doing the things you love to do and if you aren’t then take some time this weekend and invite some friends over to share a glass of wine and something decadent to eat! Come Monday morning you’ll feel better for it!

Tuesday, February 19, 2008

Coming up on March 3rd, Meena Agarwal will join me as special guest chef for our Indian 1o1 class. I’m looking forward to this class as it’s always fun to share the kitchen with someone who has as much passion about food as Meena does. Her extremely popular blog Hooked on Heat showcases mouth watering recipes and great information about her favourite Indian and Malaysian dishes.


Recently I caught up with Meena to ask her a few questions about her background, her love of cooking and if she’d share her favourite recipe with us. Here’s part of our conversation. Click here for the entire interview.


NH: You have such an eclectic background with your mom being Malaysian, your dad being an Indian and you growing up in the Middle East. How do you think this has influenced your cooking style?


MA: The food I cook regularly for my daily meals are often a blend of my favourite dishes from almost every part of the world that I’ve had the good fortune to visit. Most times, it’s only a memory of a dish I ate somewhere that gets me experimenting. I love how mixing different flavours can create a wonderful concoction for your palate.


NH: What do you think the biggest misconception about Indian food is?


MA: Of the few complaints I get on Indian cooking, the one that stands most prominent is the myth that Indian cooking is just too hard. Try as I might, somehow, I can’t convince people enough on just how simple and quick and not to mention, healthy, Indian food can be. Now before you roll your eyes at me and say, “Yeah sure, easy for you, you’re Indian!” just hear me out. True, I was born in an Indian household with a Mom who cooks the most delicious Indian food I know. But truth be told, and as much as I would like to believe, I wasn’t born with Indian culinary instincts in me. Like any of you not familiar with the South-Asian cuisine, I too started off without much knowledge.


NH: Like my husband, you joke that your hubby is your guinea pig. Do you think they know how good they have it??!!


MA: Oh, I definitely hope so! Or maybe we leave them to fend for themselves, and ask them what they think!

Thursday, February 14, 2008

I’m sure we’ve all seen the commercials, a pouting but sultry woman flipping her gorgeous, shiny, long hair over her shoulder, breathlessly telling us she’s worth it. Of course we’re worth clean, shiny hair without any tell tale skunk lines. I’d also like to think I’m worth a tad bit more than that. I’d like to think I was worth a hot bubble bath every night. Perhaps a warming glass of Merlot and a chance to read my book for 10 minutes without being interrupted. Or the opportunity to curl up in front of the tv and watch some brainless show without feeling guilty for it! But I think I’m dreaming on all those accounts; not the worthy part of it just finding the time to do it!

With Valentine’s Day fast approaching I thought if I can’t manage all of the above (particularly the no skunk line with my schedule) then perhaps I’ll treat myself to a sweet treat. But what to make I thought? So when I came across this Nice and Easy Raspberry Toffee Ice-Cream Cake I knew I was worthy of it! It’s a no bake, easy to assemble treat that has all my favourite dessert flavours; tangy raspberry, smooth vanilla and the decadence of white chocolate. The striped colours of bright red and white are perfect for Valentine’s Day so even though I’ll tell my family I made it for them, I might just cut the recipe in half and hide my own special sized treat…because you guessed it; I’m worth it! Now I have to work on balancing the cake plate, wine glass and book while I step into the tub!
Whatever size you make, I’m sure you’ll enjoy this delicious cake because you’re worth it too!

Nice & Easy Raspberry Toffee Ice-Cream Cake
Serves 12
Preparation Time: 10 minutes + refrigeration time
Cooking time: 0 minutes (don't you love this number!!)

Ingredients:

  • 1 litre good quality vanilla ice-cream
  • 1 litre good quality raspberry sorbet or gelato
  • 1 litre good quality English toffee ice-cream
  • 250g fresh raspberries
  • Good quality white chocolate for garnish

  • Line a deep 19cm square cake pan with two pieces of plastic wrap so base is covered twice and wrap extends 5cm over all four sides.
  • Soften vanilla ice-cream slightly. Spoon into prepared pan, pressing into an even layer with the back of a spoon. Freeze for about 1 hour or until firm. Tip: Spray the back of your spoon with non-stick cooking spray and your spoon will easily slide over the ice-cream.
  • Spoon sorbet onto vanilla ice-cream layer with back of a spoon. Freeze about 1 hour or until firm.
  • Soften toffee ice-cream slightly. Spoon onto sorbet, pressing into even layer with back of a spoon. Cover, freeze about 6 hours or overnight.
  • To serve, invert pan onto serving platter and carefully remove plastic wrap. Spoon fresh raspberries on top and garnish with shavings of white chocolate.

    *Recipe adapted from the Australian Women’s Weekly